To select then edit a routing:
-
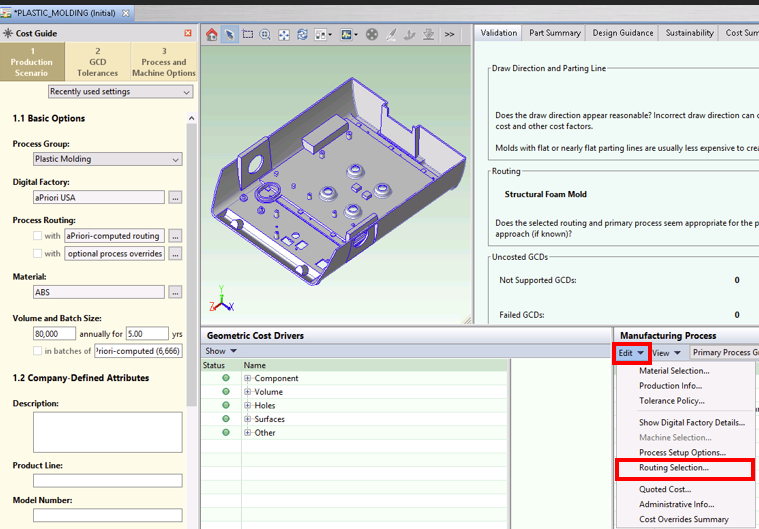
In the Manufacturing Process pane, click Edit > Routing Selection or right-click and select Routing Selection:
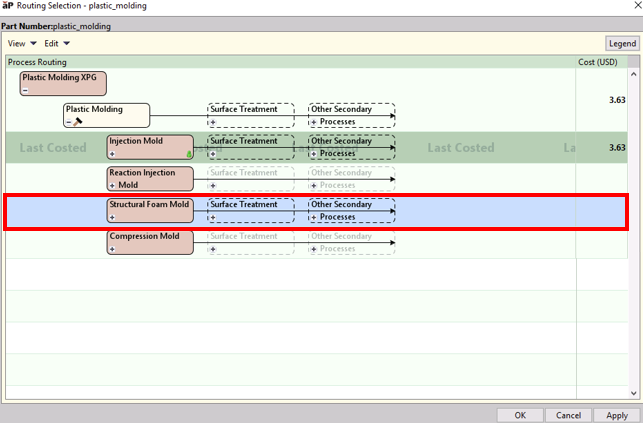
The Routing Selection window is displayed and shows the last costed routing with a darker green color and the words “Last Costed”:

Selected node shows the cost status indicator:
- Green: Costing on this node completed successfully.
- Yellow: Costing on this node completed with warnings. Typically, indicates that feasibility rules were not evaluated or that there are uncosted GCDs associated with the process.
- Red: Costing on this node failed. Click on the red status indicator to see which GCDs failed to cost.
-
To change the routing, click the row containing the routing you want to choose (the row color changes to blue).
-
Change routing options as needed by Select Alternative Processes
-
Customize the routing for the component by inserting or reordering processes, including Custom Processes. See Create Custom Routings.
-
Click OK to cost the component and close the window, or click Apply to cost the component and see the resulting cost updated in the Routing Selection window.
-
After you close the Routing Selection window, aP Pro remembers the costs calculated in the last costing event only (as the "pinned routing"), so you can manually select a preferred routing for quicker processing when costing.
When you re-open the Routing Selection window, uncosted routings are displayed only if the View > Show Routings with Incomplete Cost option is selected.